Proof of play provides statistics about media playback.
Step 1: Enable Proof of Play Globally in the system
This feature can be enabled at the Management Console from the Settings Page.
-
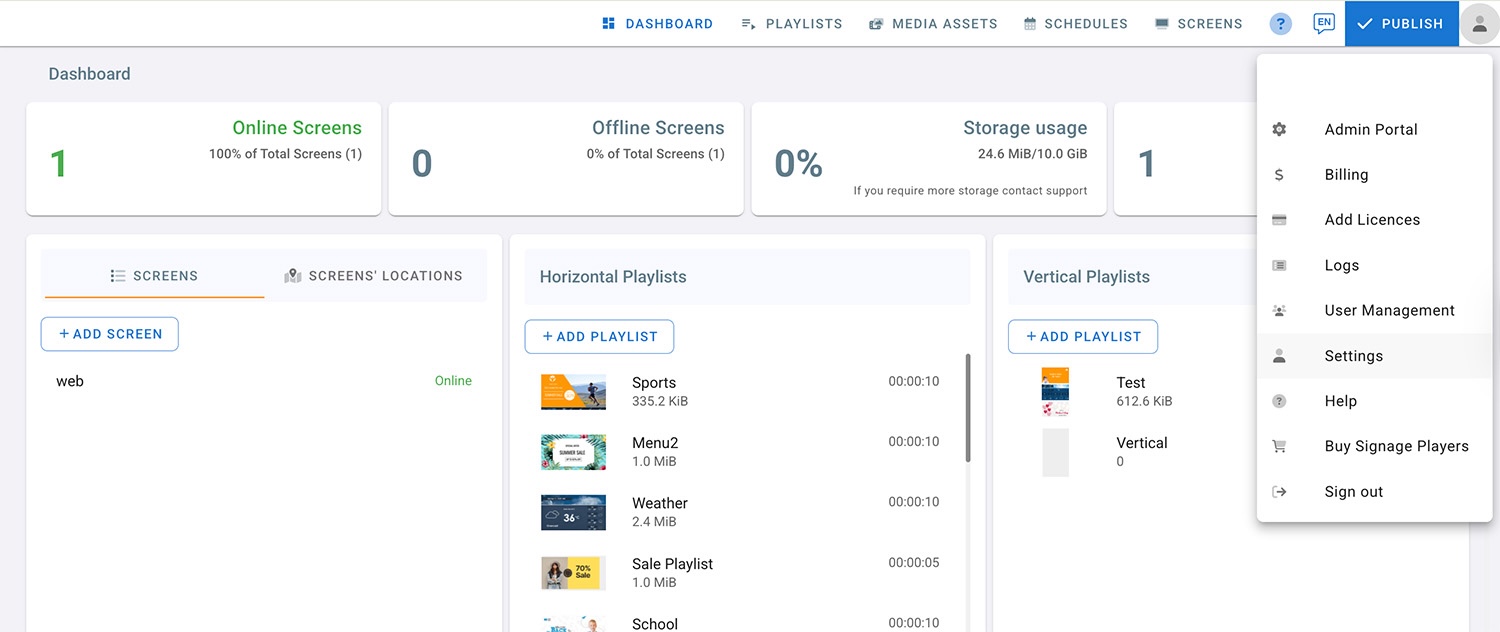
Click on the account profile on the top right corner.
-
Select Settings.
-
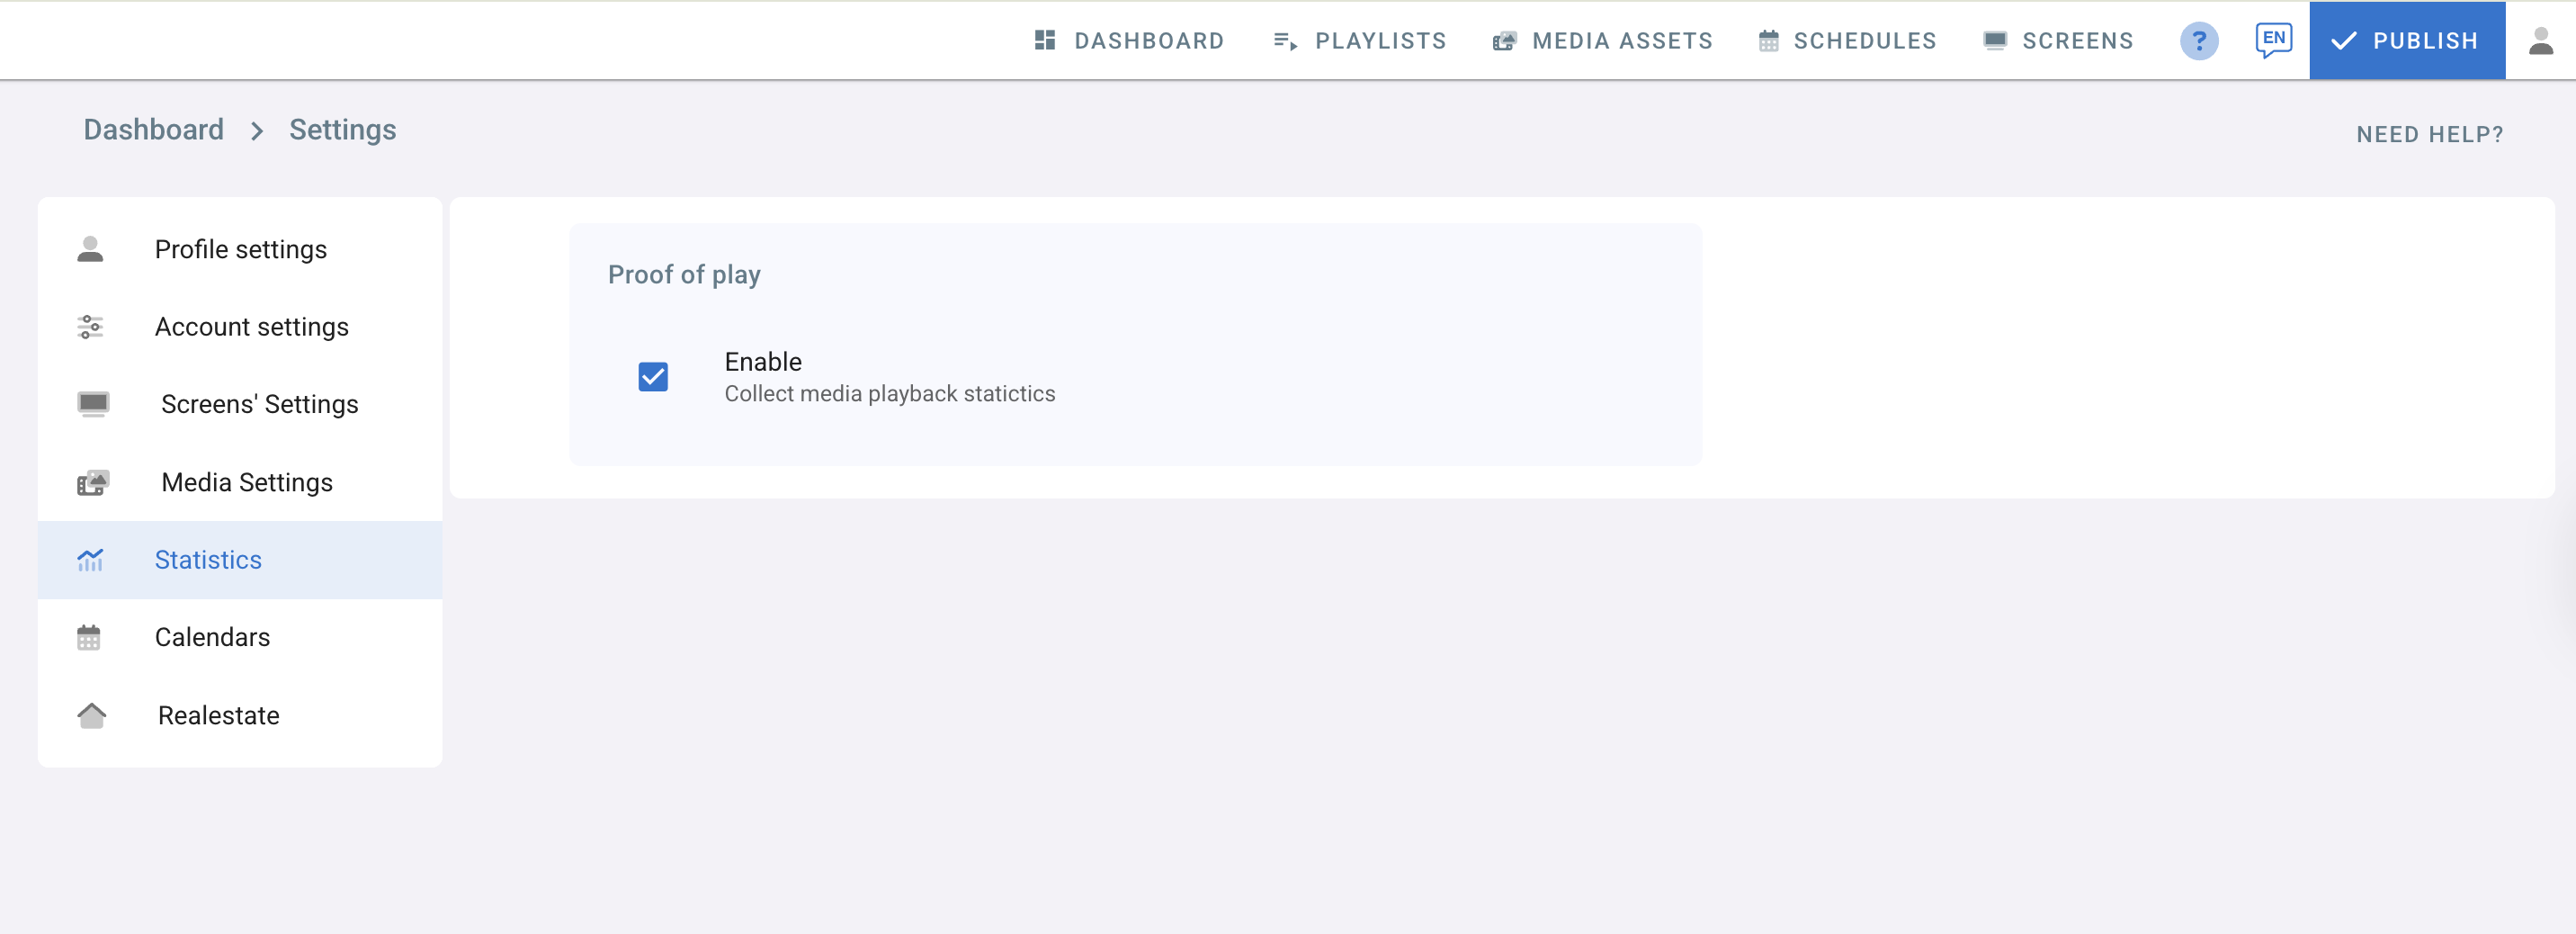
Go to Statistics.
-
Check the proof of play check box to enable this feature
Step 2: Enable Proof of play on the media

- Go to playlists page and click on your playlist
- Click on a layer
- Click Edit on the media to add to proof of play
- In the Media Settings panel on the right check Enable proof of play checkbox. This way you can choose which media you want to get statistics for.
- Enter the tags for each media, they will be used to filter the proof of play logs later.
- Change Media Name if required, it will also help you identify this media in the proof of play logs.
- Click on Save
Step 3: Preview Statistics
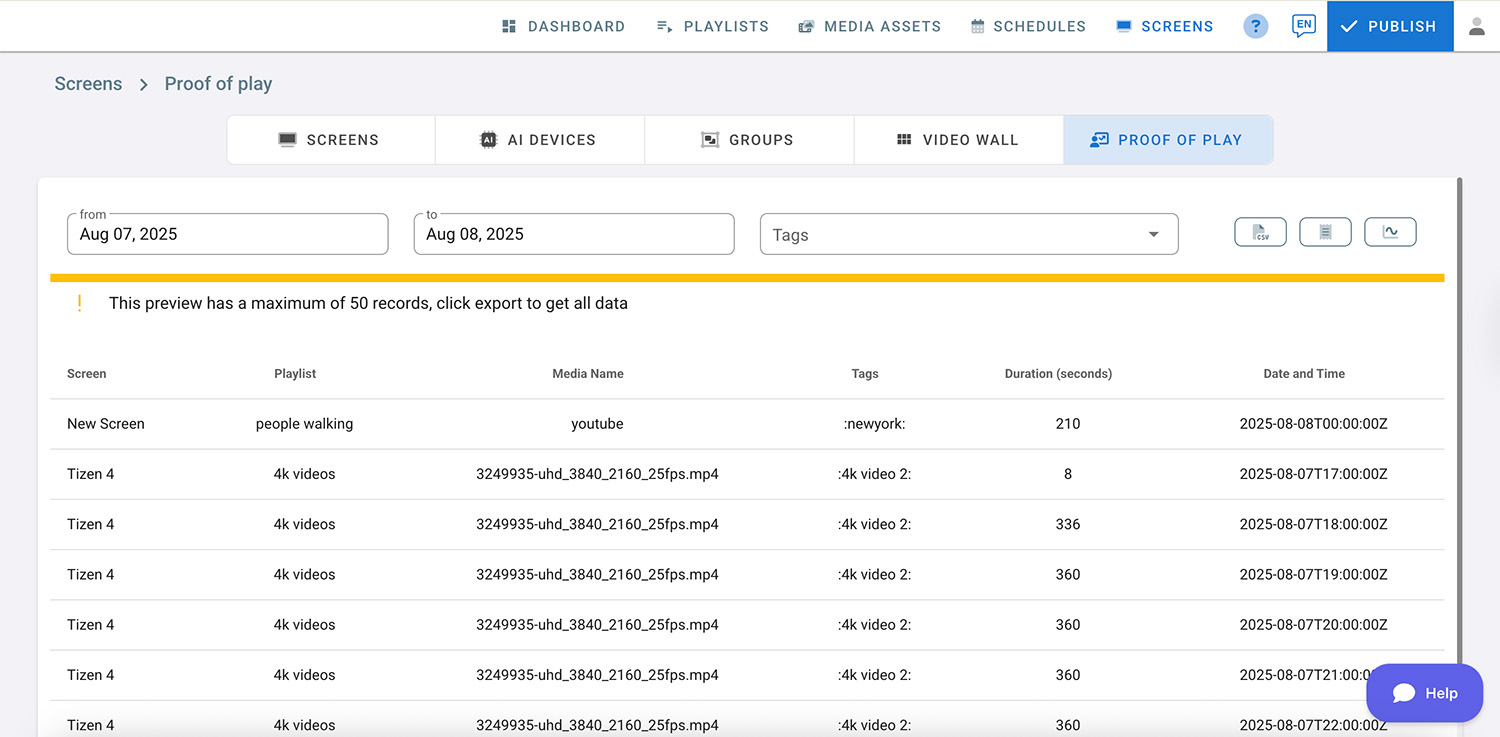
- Go to Screens Page
- Click on Proof of Play
- Choose a start and end date
- Choose tags from the drop down by checking them to filter the list
- Click on Preview
- Click on Export to export the results to a CSV file.
Step 4: Proof of Play Dashboard
The Proof of Play dashboard provides easy-to-read data reports on media playback statistics, enabling you to effectively monitor digital signage content and create successful ad campaigns.
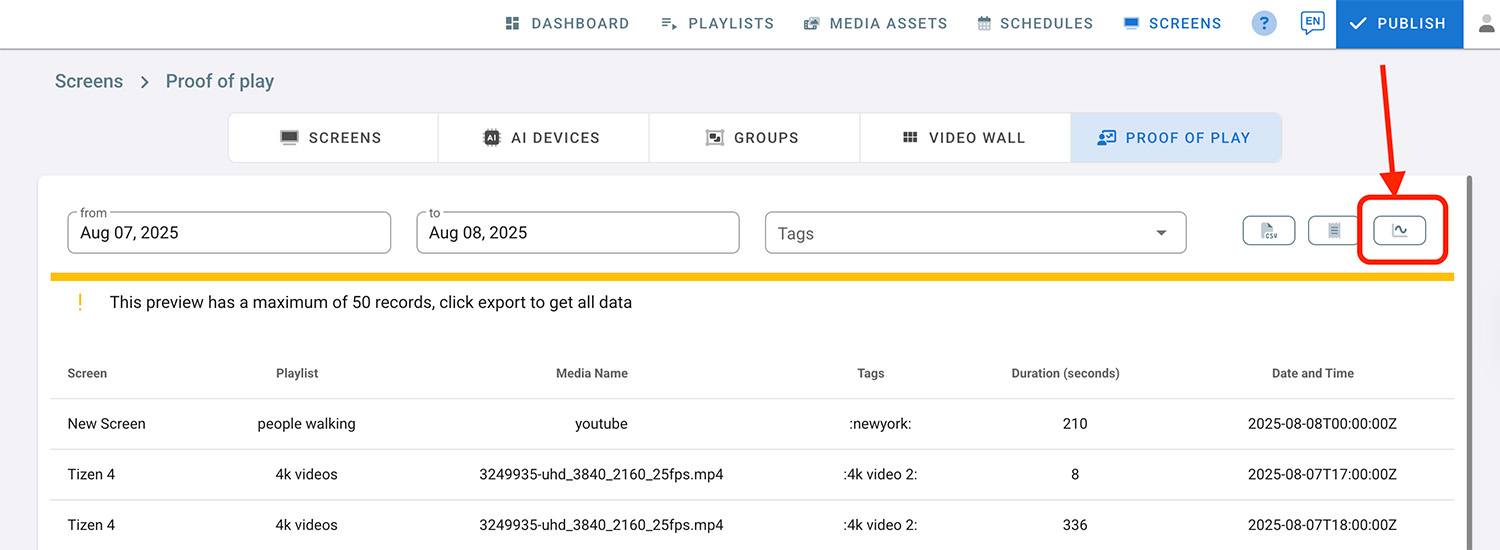
- Click the “Open Dashboard” button next to “Preview”.
- The Proof of Play Analytics dashboard will open in a new tab.
- In the Filters section, select a date to view the report.
Filters (optional):
- In the “Players” field, choose a specific player to see its data for the selected date.
- In the “Playlist” field, choose a specific playlist to view its data.
- In the “Media Files” field, select a specific media file to view its data in the report.
- In the “Tags” field, select a specific tag to view its data in the report.
Note: if there’s no data available in the report, the Players, Playlist, Media Files, and Tags fields will not show.
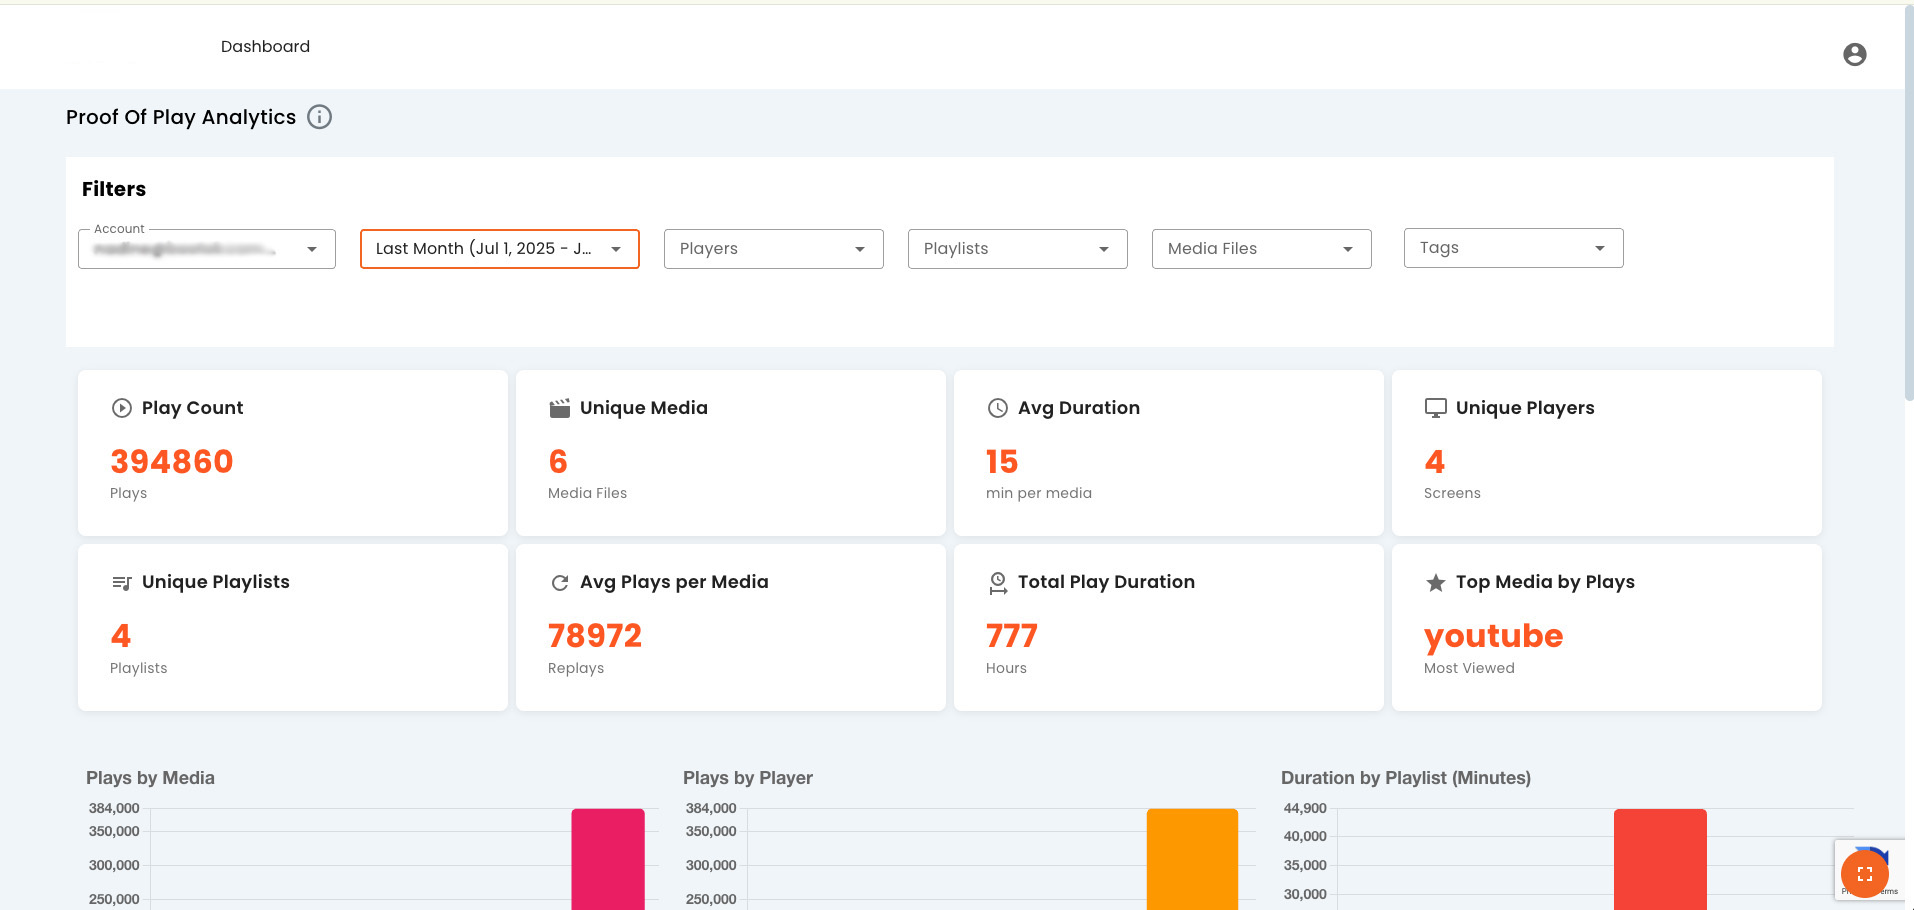
- You can click the Toggle in the bottom right corner for a fullscreen view.
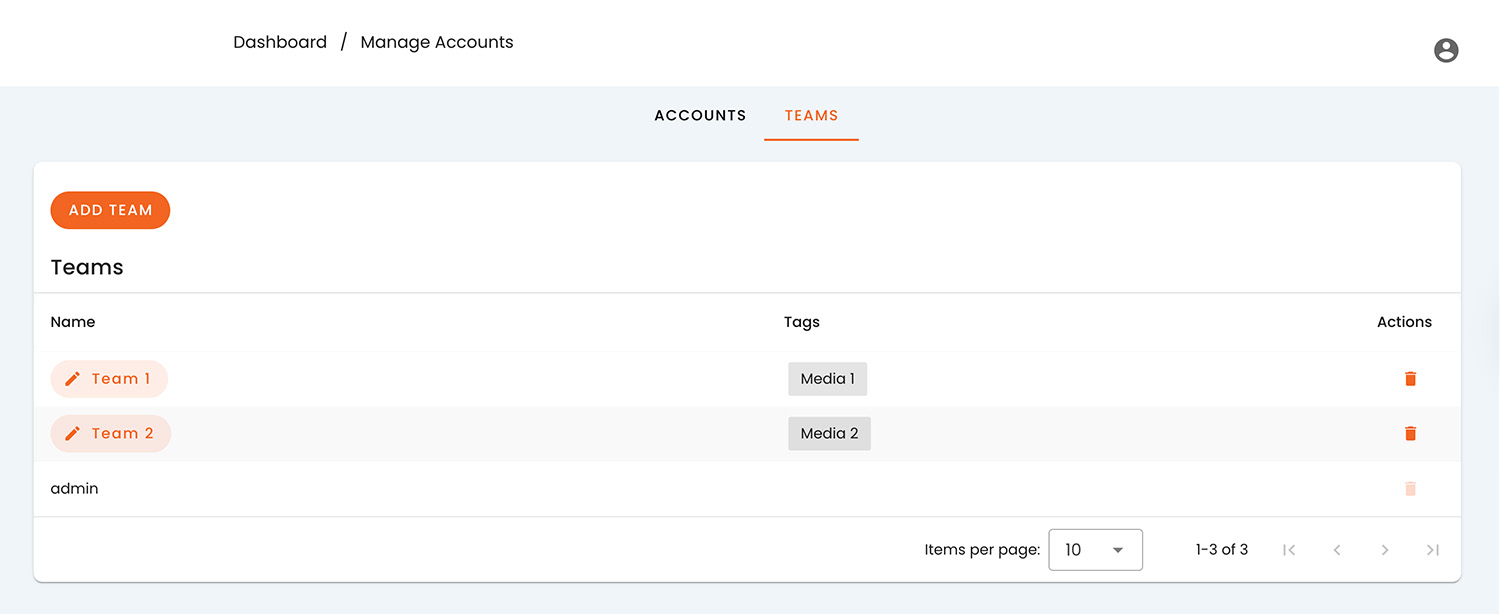
Step 5: Manage Accounts
In this section, you can manage your dashboard by adding accounts, creating teams, and assigning these teams to specific accounts for access and control.
- Click the profile icon in the top right corner.
- Select Manage Accounts.
- Navigate to the Teams tab and click “Add Team”.
- Enter the Team name and relevant media tags for this team to access.
- If no tags are assigned, the accounts in this team can have full media access.
- Now, navigate to the ACCOUNTS tab and click “Add Account”.
- Enter the account you want to grant dashboard access (e.g. example@domain.com).
- Select a team from the dropdown menu.
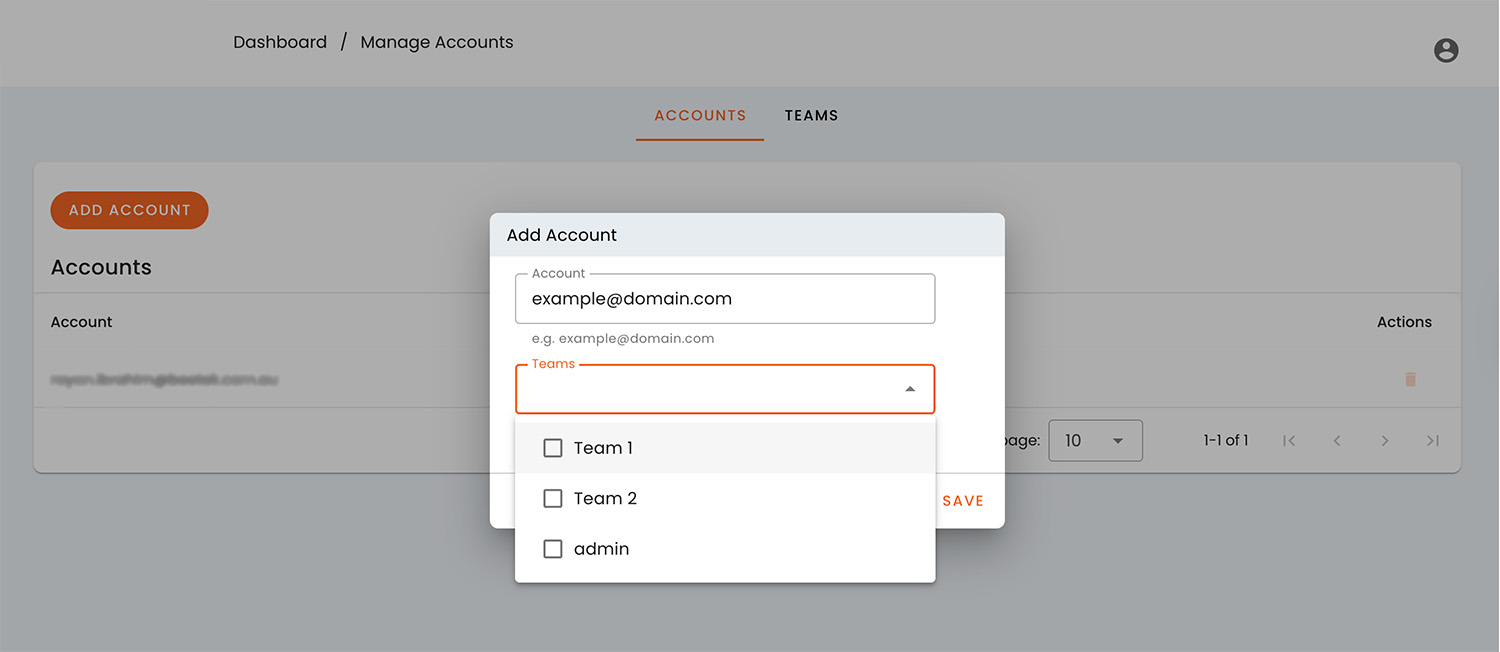
- Now, the added accounts will have access to your proof of play dashboard based on their associated team and assigned media tag.